15. Case 11: micro:bit Remote Control
15.1. Purpose
- Use another micro:bit as a remote control for your Cutebot.
- Both micro:bit needs to be programmed.
15.4. Programming
Step 1
- Click the “Advanced” to see more choices in the MakeCode drawer.
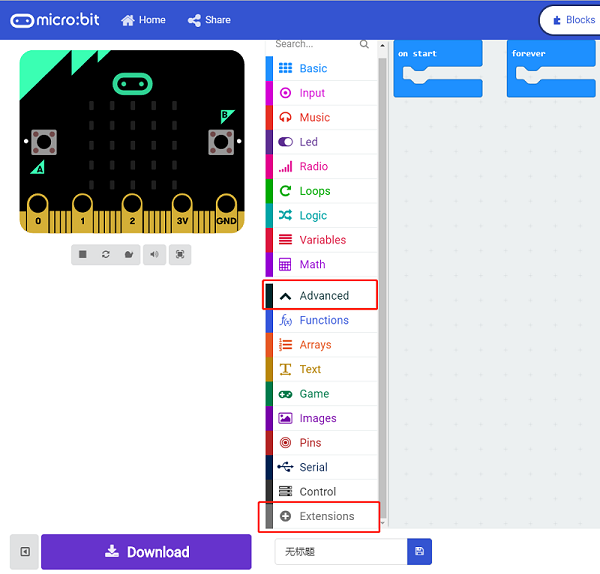
- A codebase is required for Cutebot programming, click “Add Package” at the bottom of the drawer, search
Cutebotin the dialogue box and download it.
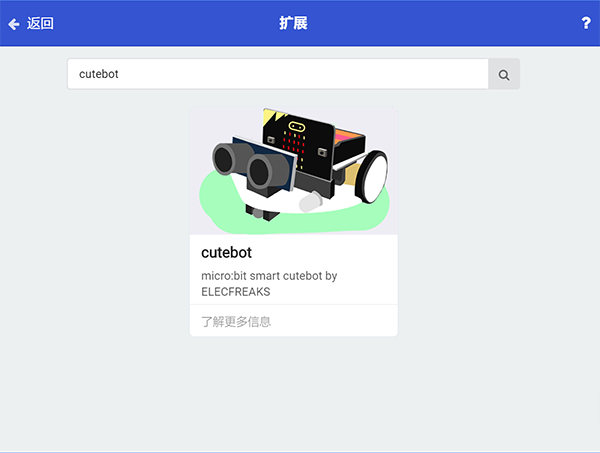
Note: If you met a tip indicating incompatibility of the codebase, you can continue with the tips or build a new project there.
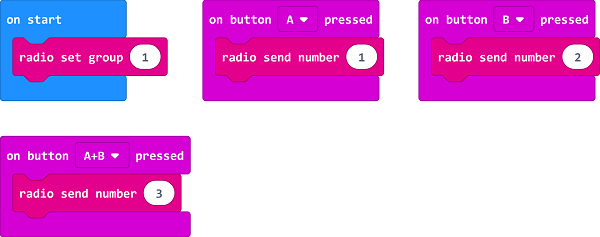
Step 2: Remote Control Programming
- Set the “radio set group” to
1in theOn startbrick. - Send radio number in
1when pressing button A. - Send radio number in
2when pressing button B. - Send radio number in
3when pressing button A+B.
Programming
links: https://makecode.microbit.org/_9JCE5Ta78DL9
You can also download it directly below:
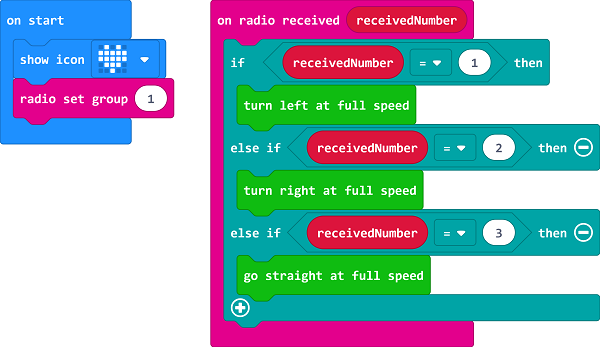
Step 3: Cutebot Programming
- Drag “show icon” brick into the
On startbrick and set the “radio set group” to1. Items must be the same with the remote control for the correct match. - Drag three “if” bricks into the
on radio receivedbrick and judge if the received number is1,2or3. - When the received number is
1, turn left. - When the received number is
2, turn right. - When the received number is
3, go straight.
Programming
Links: https://makecode.microbit.org/_eTEdPEKvRHEa
You can also download it directly below: